How Cast Metal Signs are Made
1. We Design the Sign with our Clients
The first step in any sign project is to come up with a design for the sign. At Croft Cast Signs we are happy to work from sketches and ideas that our clients may have for their signs, or to create something from scratch. Whichever route we take we always work closely with our clients to ensure that the signs we produce meet our clients specification and expectations.
We stock a wide range of sign emblems which can be used on cast metal signs - we are happy to provide photos of these upon request.
If you have an existing logo or particular typeface you want to use within your sign design, please let us know as soon as possible so we can work this into the design of the sign. We can usually re-create corporate logos into 3 dimensions so that these can be incorporated.
2. Make a Pattern
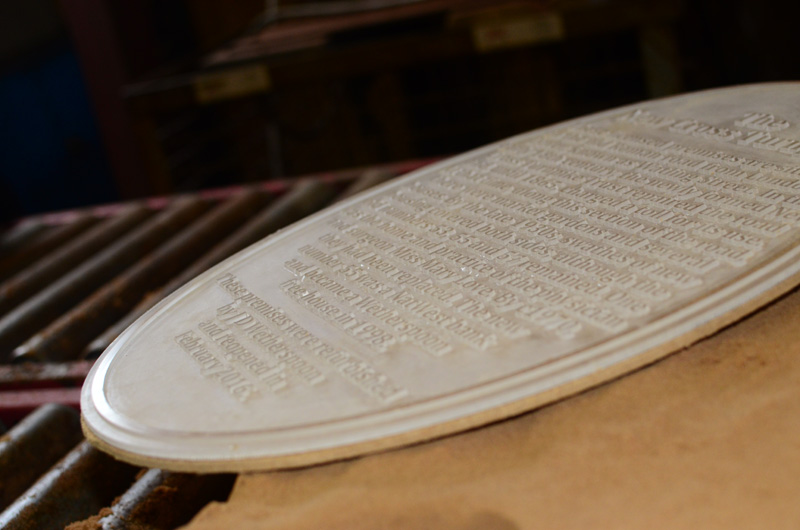
Once the design of the sign has been agreed we will make a version of the sign usually in acrylic. This copy of the sign is produced at the exact size of the finished sign and will include all of the design elements required in the final sign.
Depending on the design of the sign, the acrylic pattern may be produced by hand using moveable type and emblems, or it may be produced using our CNC router which is a far more efficient manufacturing method for signs which contain a lot of text or intricate imagery.
3. Make a Sand Mould
From the acrylic pattern we produce a sand mould into which the hot metal will be poured. To do this we first choose an appropriately sized container for the mould and then pack a special mixture of sand and hardener into the container around the acrylic pattern. The sand is left to go hard which usually takes no more than an hour.
Once the sand has hardened, the mould is turned over and the process is repeated to create the back of the mould. The two halves are kept aligned by creating location points in the 4 corners of the sand moulds which ensures that the two halves of the mould can be separated and reconnected accurately before the metal sign is cast.
The two halves of the moulds are glued together, with the acrylic patterns having been removed leaving a cavity within the sand.

4. Heat the Aluminium
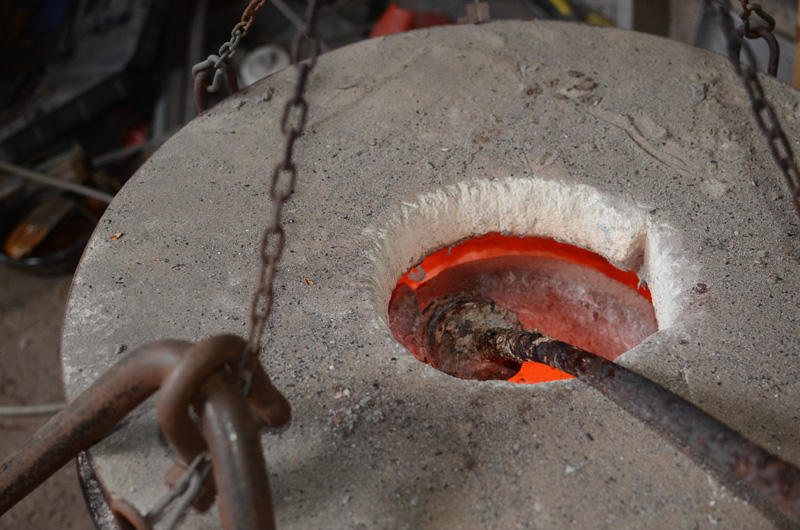
High quality aluminium bars are melted in our gas furnace and heated to a temperature of around 700ºC. We mix a special chemical into the aluminium to force any impurities to the surface and remove any bubbles of gas which may reside within the metal.
Once the impurities have been skimmed from the surface of the molten metal it is ready to be poured.
5. Cast the Metal Sign
The hot metal is poured into the mould. This is a critical stage in the sign-making process. If the metal cools too quickly it will not run into the fine detail of the sign mould but if it is too hot or poured too quickly it can damage the mould.

6. Break the Mould Open
Once the metal has cooled the moulds are broken open to reveal the cast sign. At this point the signs are thoroughly checked for faults such as air bubbles, cracks or missing details. If anything is found to be wrong with the sign at this stage a new sand mould must be created and the sign re-cast.

7. 'Fettle' the Sign
Provided there are no obvious faults with the sign we will then spend some time 'fettling' the sign to prepare it for painting. This process includes removing any 'run-ins' which have been introduced to allow the metal to flow into the mould and ensuring that the sign is free from any sharp edges which could cause injury.
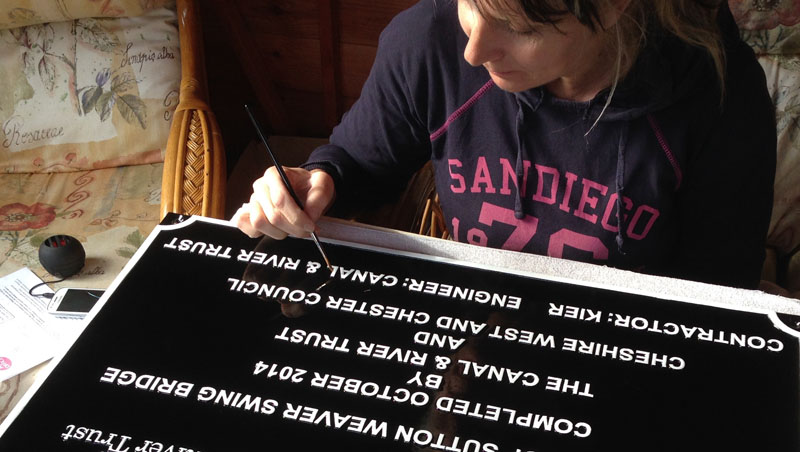
8. Paint the Sign
Our signs are painred by first priming with an epoxy primer, followed by spraying with a 2-pack UV resistant paint. Letters and emblems are finished by hand using signwriters' enamels. These paints provide both a strong and uniform colour but also are incredibly robust - standing up to the elements and UV radiation ensuring that a finished sign continues to look as good as new for years to come.